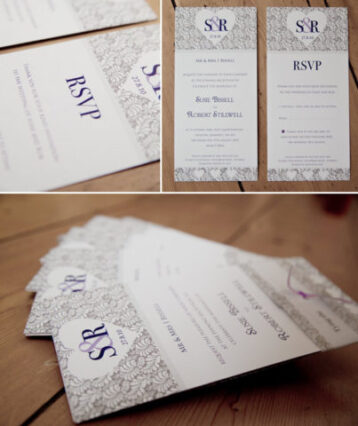
 Wedding invitations should display 2 things:
- The theme of the wedding
- The complimentary personalities of the people getting married
One way to ensure that your invitations are perfect — and save a little money — is to make them yourself.
Here’s how…
What you need:
- Photoshop (version 7 or higher)
- Swatches of your wedding colors
- Printer /Scanner
- Heavyweight, semi-gloss paper
- Photo of the happy couple
Step-by-step instructions:
#1. Prepare your background.
Scan the swatches you have of your wedding colors. Once they’ve been saved on your computer, open Photoshop and then open the scan document. These are the color examples to use in the invitation layout.
#2. Begin the layout.
In Photoshop, go to File–>New Document. When deciding the size of your document, it is helpful to change the measurement to inches and then make the document the exact size you want your finished invitations to be. This prevents squishing, stretching, or other warping in the final product. Once a blank document is open, choose the Color Selection tool (it looks like an eye dropper) and select one of your wedding colors as the background. Use the Bucket tool to fill the document with the chosen color.
#3. Add your photos.
Many wedding invitations contain 1 or 2 photos of the happy couple. To duplicate this, save the picture you want onto your computer, and then open it with Photoshop. Select the whole picture by going to Edit–>Select All, and then copy it by going to Edit–>Copy. Go back to your invitation and then choose Edit–>Paste. You can now resize, rotate, and place the photo however you desire. Repeat with another photo if you’d like.
#4. Add some embellishments.
The second or third wedding color may be used as accent colors for the invitation. You may find border designs, clip art, or even draw your own unique designs and add to your invitations. This is the creative part — where you let your personality shine! Be sure these decorations are on a new layer in Photoshop by going to Layer–>New Layer. That way, if you make a mistake, it won’t affect the rest of your work thus far.
#5. Add text.
Text is the last thing to add to your wedding invitation. Once you’re happy with the overall layout, then add the text. Most Photoshop versions have many fonts to choose from. If you just can’t find the perfect one for your invitations that way, then search for a font online and download it. Once you’ve found the perfect font, add a new layer to your Photoshop document and select the Text tool. Place the cursor where you want to start typing, and then add whatever text you’d like. Photoshop allows for many types of text formatting such as centering, bold, italic, underlined, and even shadowed text for full customization.
#6. Print and mail.
When everything is exactly the way you would like it, it’s time to print your wedding invitations. The semi-gloss paper adds a professional touch, and all that’s left to do is to cut your invitations to size before stuffing and addressing envelopes.
Your wedding guests will be impressed by the personal touches that you’ve added to your wedding invitations. And you’ll be impressed that you’ve saved a lot of money by designing and printing them yourself!
I write about using maternity acupressure to induce labor. I also enjoy crafts, art, interior decorating, and lots of other hobbies.